The Marketing tab within the Monad Admin Console allows custom filters to be created and saved as lists. These lists can subsequently be pushed out to Mailchimp.
The screenshot below shows the marketing tab which is split into a dashboard for regular monitoring of marketing KPIs and 3 main sections; filter creation, work area and stored lists.

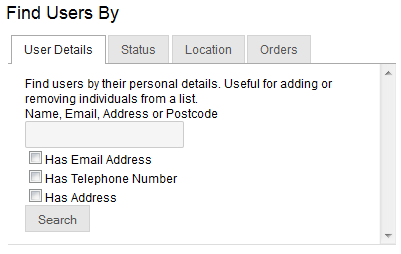
To create custom marketing filters, use the section on the bottom left of the marketing tab labeled “Find Users By”. This section is split into 4 filter tabs; User Details, Status, Location, Orders. This allows for single or multiple filter criteria to be selected.
For example, a filter could be applied to identify customer records that are recently expired members, 10km from a specific postcode, who have had at least 1 order so far this year. This could then be used as a location-specific mailshot highlighting future events in the area and trying to encourage the renewal of membership.
Filter Criteria:
| User Details Used to find an individual user record. |
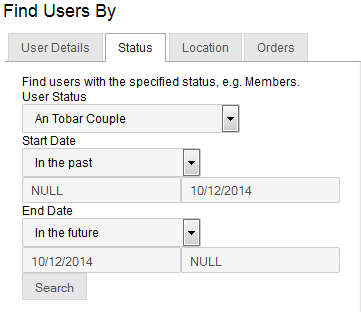
| Status This tab specifically focuses on members and allows user records to be filtered according to membership status including start date and end date for membership. |
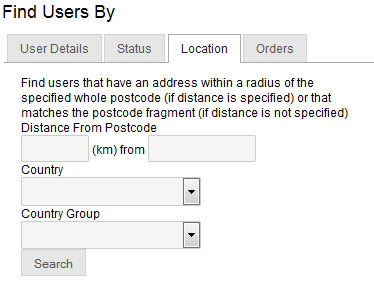
| Location To specify a location, a specific postcode can be entered in addition to the distance in kilometres from the postcode. A country and indeed a country group can also be specified depending filter requirements and relevant demographic. |
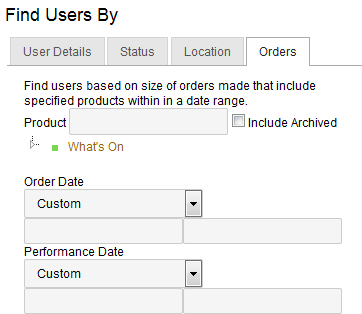
| Orders A specific folder or product can be selected then further filters applied such as order date, performance date, and discount. Total number of items, total value, loyalty points and donation value are all additional filter criteria which can be selected within the Orders tab. |

Once filter criteria has been entered, click on the Search button at the bottom of the filter tab and the Work Area Search Results will contain the number of records which meet the search criteria:

To save this list, simply drag the search results circle to the upper portion of the marketing tab and a Save As pop up box will appear where a name and a description can be defined.
To use the list, it must be dragged and dropped into the Active List circle. It is also possible to drag a second list into the active list to find different combinations of both lists.
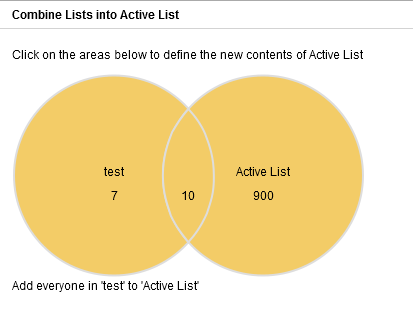
The previous screenshot shows two lists and 3 possible data selections:
- Test excluding the records which are also on Active List (7 records)
- Test records which are also on the Active List (10 records)
- Active List excluding the records which are also on the Test list (900 records)
The default is all records selected. However, if the middle portion of the two circles is clicked on it will be deselected and the diagram will look like this:

This will then include unique Test records and Active List records but exclude any which belong to both groups.
This selection can also be saved as a separate search. All lists can also be viewed in detail by right clicking and selecting View Users:

With all selections there are a number of additional options available:
- Random Filter – This allows additional filter criteria to be applied to the list.
- User Status – Dragging the list into this area will apply a user status to each record on the list.
- Run Report – Run marketing reports using the data in the selected list.
- Mail Chimp – sync the list with Mail Chimp to run a mail campaign directly from Mailchimp using the data in the list.
- Deactivate – WARNING: Dragging a list to this area will deactivate all users on the list. Use with caution.
- Trash – deletes lists that are no longer required.