There are two main areas within the system used to configure discounts; system-wide Concession Types, and Discount Schemes which are created at folder level and applied to products.
Concession Types
System-wide Concession Types can be configured on the Settings tab of the Monad Admin Console, in the “General” category, and are used to define types of user who might qualify for concessions, e.g. child/student/OAP.
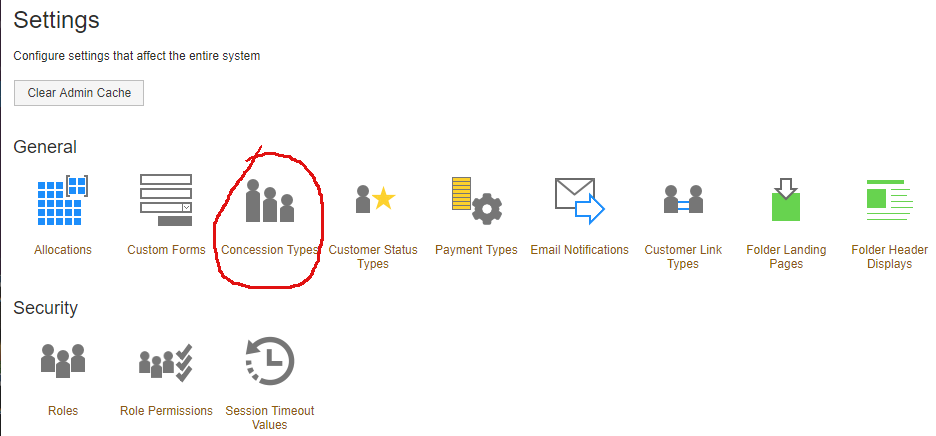
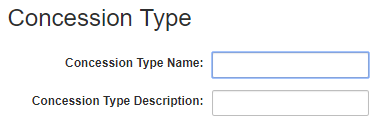
 To create a concession type, click on Concession Types and then on Add at the bottom of the list of existing levels. This will open up a pop-up window where a name and a description can be given to the new concession type. Click OK at bottom right when finished.
Note: This is purely used to create a user type for the concession rather than the discount specifics, which are instead configured in the Discount Scheme.
Discount Schemes
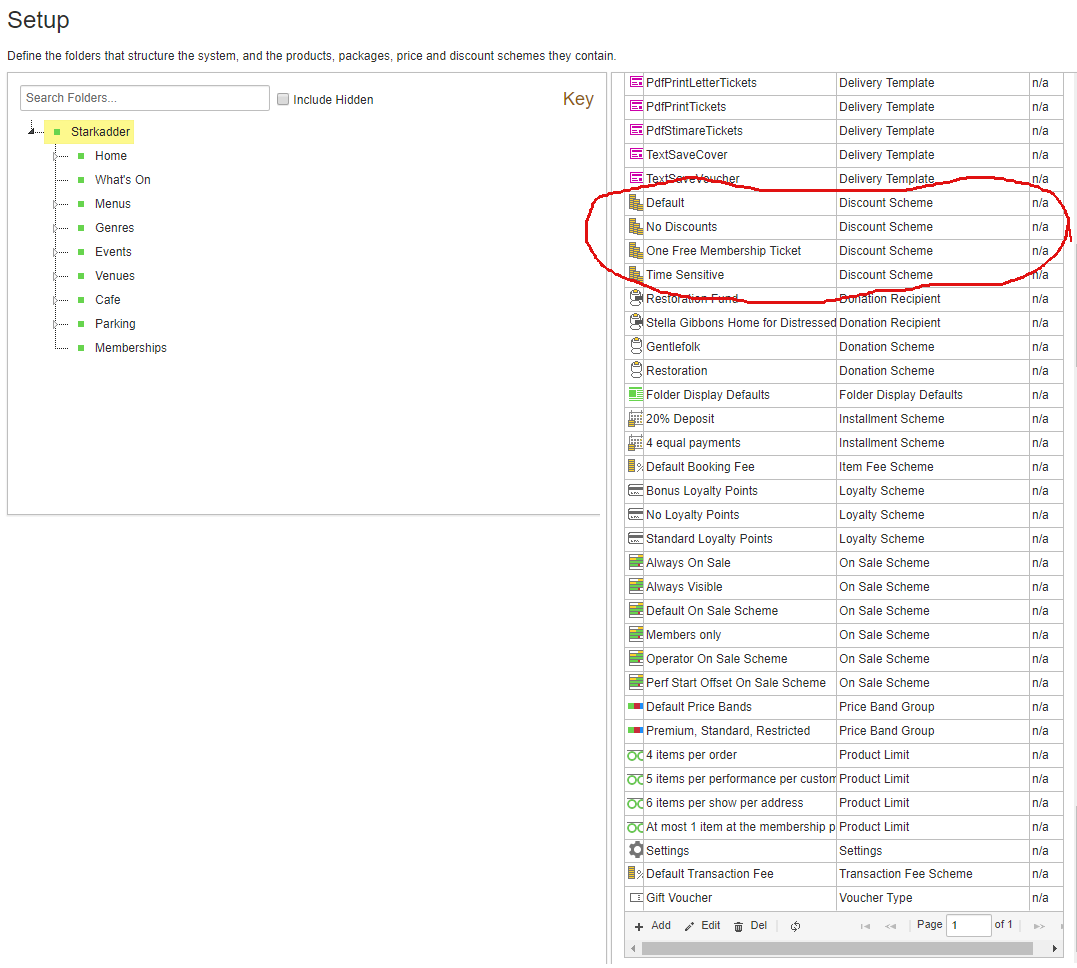
Discount Schemes are created within the folder hierarchy of the Setup tab and are used to define discounts for specific user types. Set them up in a folder which is parent to all your shows and other sales which may need to use these discounts: this could be an Events folder, or your Home folder, but on Starkadder they’ve been placed in the Starkadder root folder. The screenshot below shows four Discount Schemes within the Starkadder root folder.
To create a new Discount Scheme, select a suitable folder location and click on the Add button on the right side of the screen and select Pricing & Finance à Discount Scheme. The following window will open up:
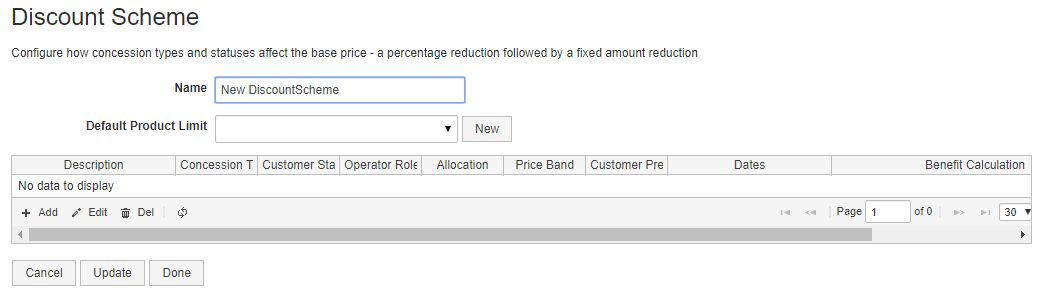
A name must then be provided, and an optional Default Product Limit, either selected from the pull-down list or created by clicking on New. This optional limit determines how many items the discount can be applied to in a single purchase.
 Next click on Add to access the Discount Scheme Value dialogue and add discount criteria line by line.
In the “Selection” session, the “Concession Type” drop-down is where the type of concession (created in the General category on the Settings tab) is selected. For example it may be an Adult discount so Adult would be selected from the drop down.
 The “Customer Status” section allows the discount to be applied to certain user types e.g. memberships or to exclude certain membership types. Selecting “Only” or “All, except” from the pull-down causes a list of options to appear beneath the pull-down, each with a box to be ticked or un-ticked.
“Operator Role” works the same way. By selecting “Only” or “All, except” from the pull-down you can include or exclude types of staff from a long list of possibilities. These options control which discount lines are active depending on what role the user is logged in under.
A similar set of tick-box options under “Allocation” can be used to include or exclude different types of ticket allocations.
The “Price Band” is used to establish whether the discount only applies to premium-price tickets or similar, while “Customer Present” specifies whether or not the customer has to be there in person to receive the discount.
In the “Date Range” section you can set whether the discount is only available between fixed start and end dates, or for a fixed date (and time if required) relative to the start or end of an event.
The standard “Description” is taken from the Concession Type which has been selected. This can be overridden by typing a new description in the “Override Description” box.
Finally, in the “Benefit Calculation” section either a flat amount or a calculated amount can be specified. The calculated amount can be a set sum deducted from the total, or a percentage taken off, with a field to set how the percentage is rounded to the nearest actual monetary value.
Note: multiple lines and conditions can be contained within a discount scheme. For example, OAP discount, Adult membership discount and a Student discount could be three entries within a single discount scheme.
Once Discount Schemes have been created, a suitable Discount Scheme can then be applied from within the pricing tab of any product.
