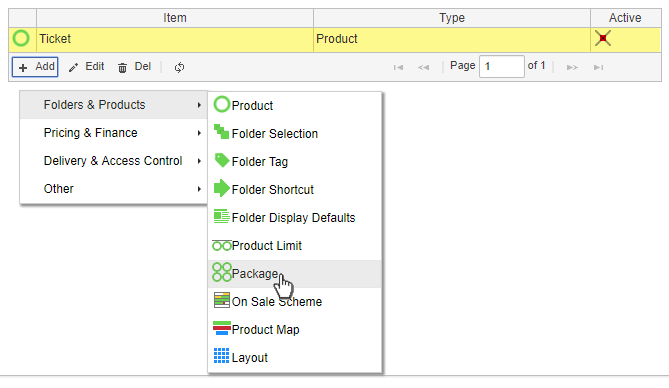
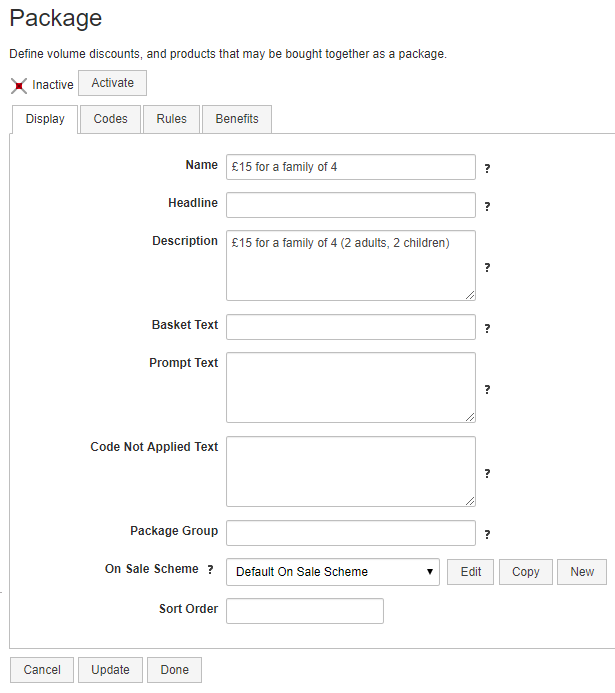
Go to the menu on the right-hand side and click Add, then Folders & Products à Package. This will take you to the Display tab for the Package form. The various fields are as follows.
At the top of the dialogue, the status of the package may be set as active or inactive. Inactive packages are not considered by the system. EVERY ticket in EVERY basket must be checked against EVERY active package to see if there is a match, so it is a good idea to deactivate packages that are for products that are no longer (or not yet) on sale.
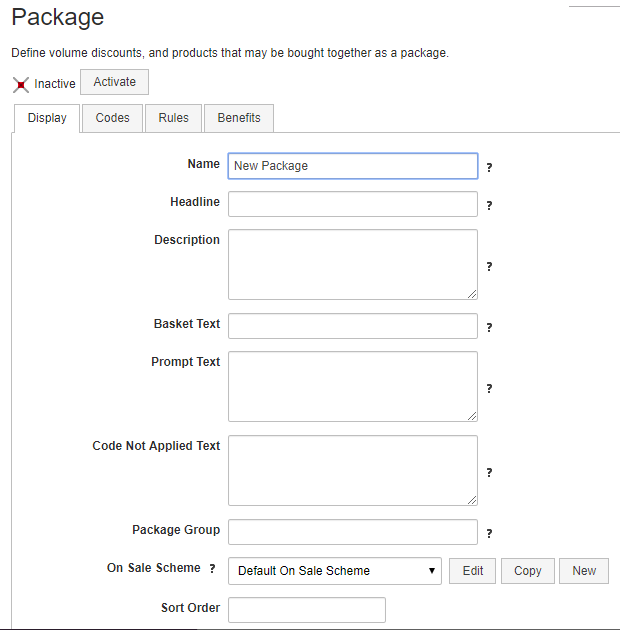
“Name” identifies the package so you can find it again.
“Headline” and “Description” will be displayed in the Adjustments section of the basket when a purchaser qualifies for the package.
“Basket Text” is displayed in the basket when a purchaser qualifies for a package.
“Prompt Text” is displayed in the basket when a purchaser nearly qualifies for a package. For example, if there is a 3 for 2 offer on, and someone has two tickets in their basket, then the prompt text might read "Add another ticket for free".
“Code Not Applied Text” is displayed when a Code matching this package is in the basket, but the other items in the basket do not meet the package rules. This is useful for additional instructions when e.g. someone is attempting to use a gift voucher code on the wrong product.
“Package Group” allows an item to be used in more than one package. Normally, each ticket or other product can only be in one package at a time, since it would be undesirable for a ticket to benefit from a 2 for 1 discount AND a family discount at the same time. However, some of the other uses for packages (e.g. upselling) do require a product to be included in two packages simultaneously: a ticket can still participate in a family ticket even if it's also in an upsell package. Giving different packages different Package Group Text allows them to be considered separately, but it is normally all right to leave this field blank.
“On Sale Scheme” controls when the package is available, and to whom. Note that On Sale Scheme relative dates (e.g. relative to Performance Start) are based on the folder the Package is in, and not the Performance folder of the items in the basket. Folder and Product Selection Filters can be used to create selections that e.g. only contain performances within the next two weeks, or performances more than 30 days in the future.
“Sort Order”: because packages may overlap, the order in which they are considered is important, as it may affect the final price to the customer.
In addition to the Display tab, you will see that there are tabs marked Codes, Rules and Benefits.
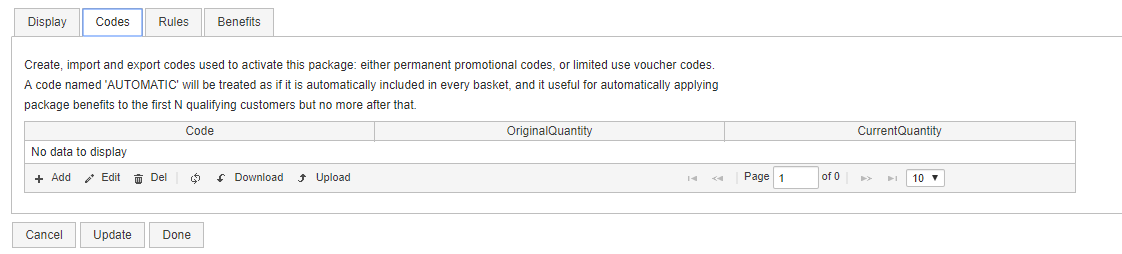
 “Codes” can require codes to activate some packages. Clicking Add from this section will bring up a set of radio buttons from which you can add an individual promo code or individual voucher code, or create multiple voucher codes.

“Rules” for packages allow you to specify the minimum and maximum quantities of products, from various selections, that need to be in the basket to qualify for the package. Clicking Add on this tab takes you to a form where you can define the properties of your package.
The most important property in the Package Rules is the Selection of Products. This needs to be defined outside the Package definition, and controls which product the package applies to. The rule can be further restricted by Concession Type, Price Band and Customer Status.
“Benefits” are the benefits which will be applied if the contents of the basket qualify for the package, the package benefits will be applied. Clicking Add on this tab will bring up the Package Benefit form. From here, you can define the savings conferred by the particular benefit package, how it is calculated and which product(s) it applies to.
Example: setting up a Family Ticket package
For the “Funhouse” event, families of four (two adults, two children) get a ticket for £24.
First we need to set-up a Folder Selection – this allows you to specify what shows/performances/products you want the package to work for. As we want this to be valid across all performances of this show, we’ll create the Folder Selection in the show folder (the “parent” folder for this show).
Select the relevant show folder, click Add in the right-hand menu and select Folders & Products à Folder Selection.
This will take you to a selection page where you will see the file-tree with new options. The selection will be automatically named after your folder, in this case “Funhouse Selection”, although you may wish to name it something else which will make it easier to identify. All performances under Funhouse will be automatically incorporated.

The file-path of your folder, e.g. Genres > Comedy > Funhouse, will appear on the right under the “Selection” heading. If you choose a higher-level folder such as Comedy, all shows under Comedy will be incorporated in your selection.
If you wish to add another show or performance which is not included under the show or higher category you started from, highlight it on the file tree and click the “Add to Selection” button, or right-click on it and select the same from the list of options, and it will appear as an additional line under “Selection” on the right. If you wish to exclude one folder from a group which is otherwise included, right-click on it and select “Exclude from Selection”.
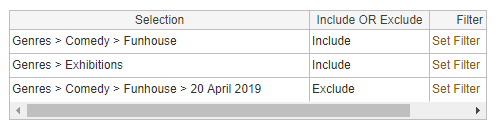
This sample group for example includes all members of the genre Exhibitions, plus the show Funhouse, except for the performance of Funhouse on 20th April, which is excluded.
To the right of each line you will see the “Set Filter” option. For lines which have been added or excluded, this will only work after you have saved your selection by clicking Update, or clicking Done, exiting the Folder Selection dialogue and then re-entering it by highlighting your selection from the items associated with its folder, and clicking Edit.
Once your selection page has been updated, selecting “Set Filter” will take you to a page where you can set conditions for each inclusion or exclusion, which determine whether the package associated with your selection will be applicable or not, including relative and exact dates. An exact date filter means that the package will apply between two specified calendar dates; relative dates mean that it will apply if it is within a given time-period of the start or end of the performance. A relative filter means that the package applies for a given number of hours and minutes relative to the performance.
When you are satisfied with your selection and filters, click Done to return to the main file tree. The show should still be highlighted. In the right-hand menu, click Add then Folders & Products à Package.
Now we need to set up our package. On the Display tab under “Name” we need to put information that is useful to staff who might need to search for this package. In “Description” we need to put information that’s useful to the public, which will appear in their basket when they’ve used the package, and on their confirmation email.
For the rules, we know we want the rule to be “you have to have 2 adult and 2 child tickets in your basket to qualify for this package”. So, go to the Rules tab and click Add. In order to create this rule we need to specify conditions for each ticket type.
Let’s start with the Adult ticket – we want this part of the rule to be “If you want 4 tickets for Funhouse at £15 you need to have 2 adult tickets for the same performance in your basket”.
“Selection of Products” – from this pull-down list, select the Folder Selection we created earlier.

“Concession Type” – select “Only” from the pull-down list, and then tick “Full Price” in the list of options which appear beneath it, as this part of the rule only applies to adult tickets.
“Customer Status” – select “(Any)” so any users can get this package.
“Scope” – select “Same performance” so the tickets have to be booked for the same performance, otherwise customers could book one for today and one for tomorrow and still qualify.
“Minimum Quantity” and “Maximum Quantity” – set both to 2. This means if they have 1 they won’t qualify. This also means if they have 3 they will only qualify once. If we had left the Maximum blank, then a group with 3 or more adult tickets would still only be charged £15. With a Maximum of 2, the discount is applied only to multiples of 2, so 2 adults (and 2 children, but we haven’t added them to the rules yet) are charged £15, 3 adults are charged £15 plus one full-price adult ticket, 4 adults are charged £30… etc.
Click “OK” to save your adult rate, then repeat the same process to create the rules for child tickets, except that under “Concession Type” we want “Only” and then “Child Rate”. The rules should now look like this:

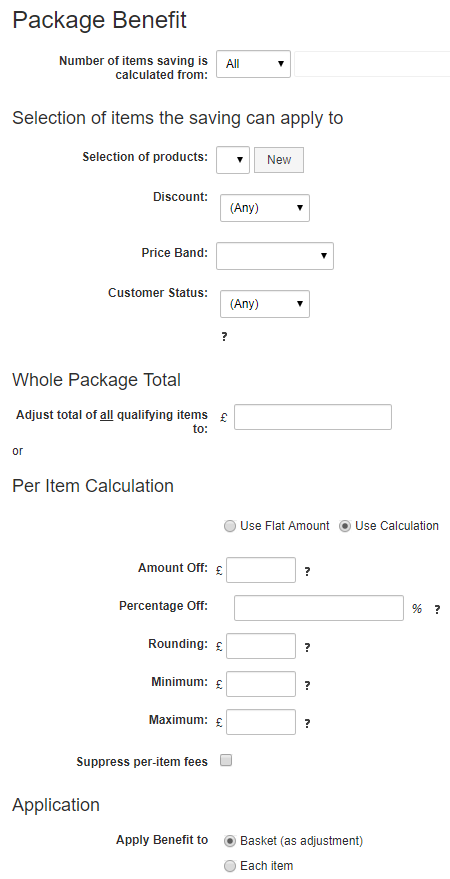
Now we need to tell the system what to do when customers qualify for this rule. In this case, we want them to get four tickets for the discounted price of £15. So, on the Benefits tab click Add to go to the Package Benefit form.
“Selection of products” and “Concession type” (as at April 2019, mislabelled “Discount”) have been dealt with in the Rules, so we can leave them blank. All we need to do is tell the system that if the customer has followed all of the rules we previously set, they get all of those things for £15. We do this by going to the “Whole Package Total” section, and entering £15 in the box labelled “Adjust total of all qualifying items to:”.
Click OK at bottom right to save these changes.
Now that the package’s rules and benefits are set up, we need to set the On Sale Scheme. Return to the Display tab, and look for the On Sale Scheme pull-down, at the bottom of the form just above Sort Order.
If we want this package to be active as long as the show is On Sale we can leave this section blank and activate the package as it is. The only performances it is valid for are the two Funhouse performances, therefore if they’re no longer on sale the package will have nothing to work on and so will become obsolete.
For the purpose of this example, however, let’s say we only want this package to be On Sale from July 25th to August 1st. We’ll need to set-up a new On Sale Scheme for this. Click “New” next to On Sale Scheme.
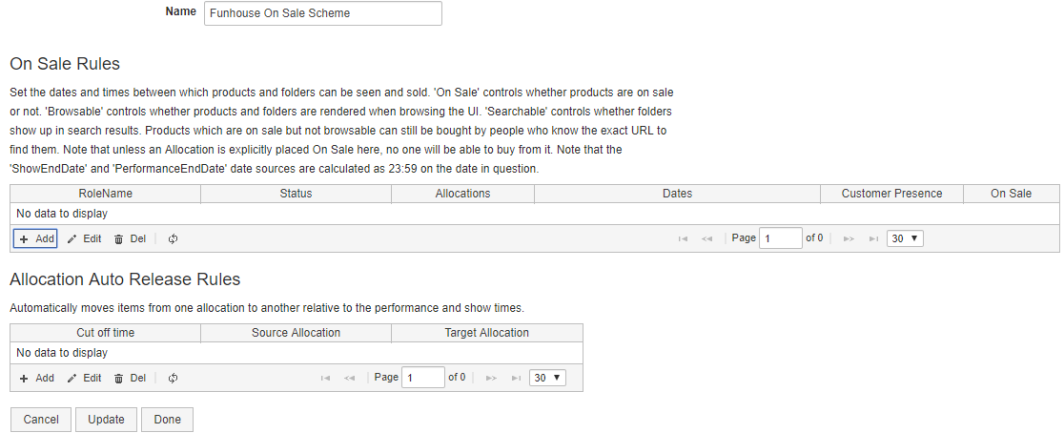
Name it something useful and click Add in the upper, On Sale Rules section to go to the form where you define a rule.
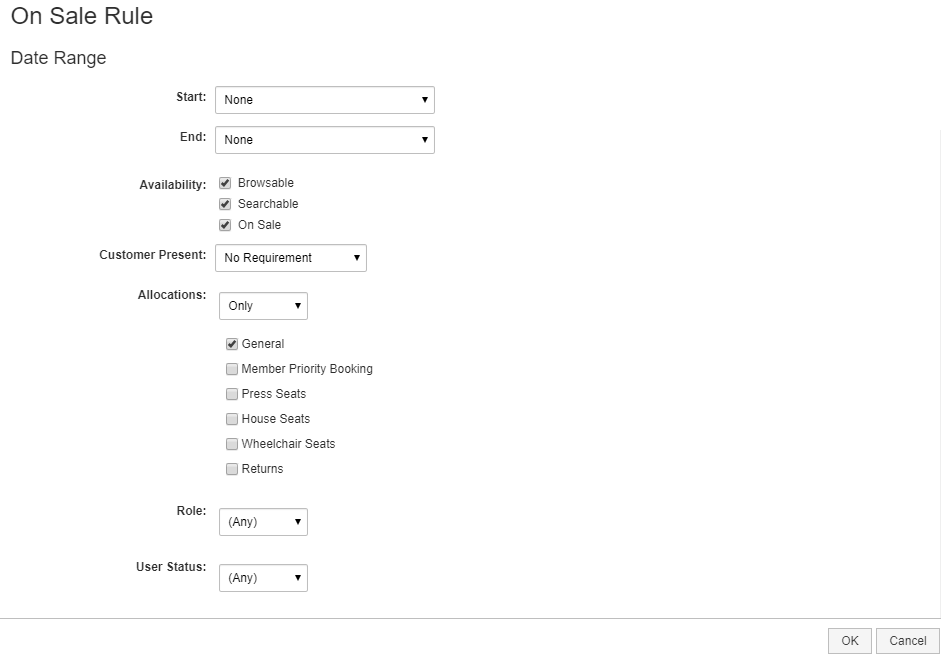
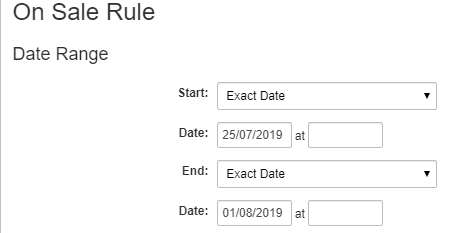
In Start we need to put the date from which we wish the package to be valid, in this case July 25th. Select Exact Date from the drop-down menu and type the date into the date box which appears beneath the pull-down. You can also specify an exact time if you want to. In End we need to put the date we want the package to be valid to, i.e. August 1st. Note that if you wish to try out your scheme and see how it looks in action, your start and end dates need to be respectively on or before and on or after the date on which you want to try it. Select Exact Date from the drop down menu and type the date in. Your Date Range section should now look like this:
We want this to be Browsable, Searchable and On Sale to any user with any role, so we can leave all of those options ticked as they are. Click Ok to save the On Sale Scheme, and then Done to go back to the package.
 At the bottom of the Package page, select the On Sale Scheme you just created from the drop-down box, just above Sort Order.
Now click“Activat” at the top of the page and Done at the bottom. The package is now set up and live.
Make sure you have set up tickets for your performances of Funhouse (for this sample, we have priced the tickets at £7 for adults with a 50% child concession). Your new On Sale Scheme will need to be selected from the On Sale Scheme pull-down for the show and for each performance individually, by right-clicking and going to Properties à Status, and for the tickets for the performances by highlighting the performance on the left and the ticket on the right, clicking Edit and going to the On Sale Scheme tab (so if you have a lot of performances, it’s best to set up your On Sale Scheme first, format one performance and ticket and then do a Performance Run).
To view your scheme in action, go to the main Setup file-tree, right-click on the Funhouse show folder and select “Activate with Contents”. For Starkadder (but not necessarily other theatrical groups), move the whole Funhouse show from Comedy to Events, then right-click on Funhouse, select Copy, then right click on Comedy and select Past as Shortcut. This causes the show to be accessible via both the Events and the Comedy folders. Then log onto https://www.starkadder.org.uk/Sales/ as a customer, find the Funhouse show and add 3 adult and 2 child tickets to your basket. The basket should like this:
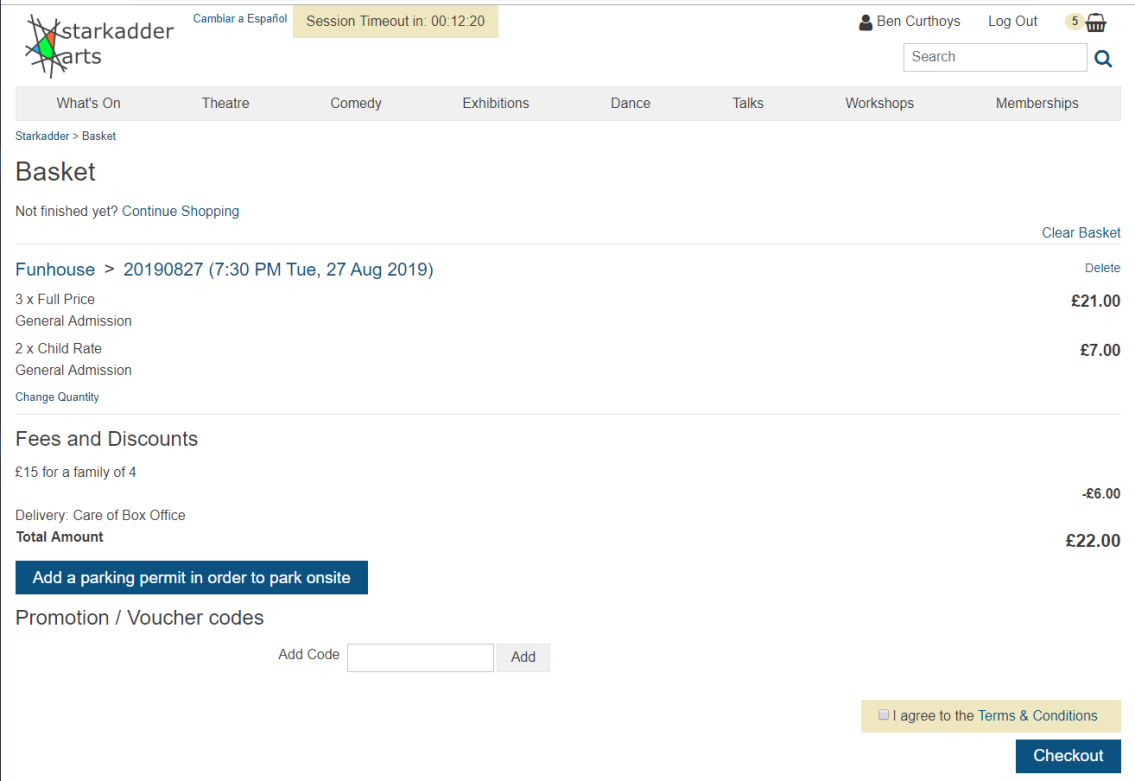
The system has correctly charged you for a group package at £15, plus one full-price adult ticket at £7.