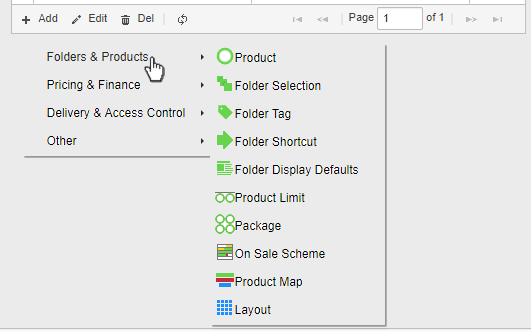
A product can be anything for sale such as a retail item or a food/drink item, and is not limited to event tickets. To add tickets or another product to an event, navigate to and select the required event folder. On the right hand half of the screen, click on Add and select the Folders & Products àProduct option.
You can also modify an existing product by highlighting it in the list of existing products on the right, and then clicking on Edit.
 Whether you are defining a new product or modifying an existing one, the Product properties screen will now appear. On the Display tab, enter a product description e.g. Ticket or Tickets. If there will be multiple products in the event folder then a sort order can be set within the Sort Order box by entering a letter or a number. You can enter the text that will be displayed to customers when a product is not on sale or is sold out.
 Click on Update to save your changes without exiting, then select the Pricing tab.
The Price Scheme, Discount Scheme, Price Preview etc. pull-downs will be empty until you have created one or more schemes within this or a parent folder (see previous section). Click on Update to save your changes without exiting and then select the Capacity tab.
 Select the Product Type to be either GA (General Admittance), Seated, Untracked or Stock. Slightly different forms will appear according to which Product Type you select.
Note: the Untracked option is generally used for non-physical non-ticket items such as vouchers and memberships, which exist in theoretically unlimited numbers and can never be sold out of, while Stock is for physical non-ticket objects such as books, food and drink and other retail items, which exist in finite quantities and can be sold out, and have deliveries which need to be tracked.
 Under Total Quantity, enter the number of products (tickets, in this case) available. If required, you can specify a certain number of seats which are to be held back or allocated to cast/board/staff etc. If such allocations are required, click on the Allocations button and the Allocations screen will appear.
Click on Add to create new types of allocations. The Allocation Quantity screen will appear.
 Note that this image shows the content of the Allocation pull-down list expanded and covering the Quantity box. Select the allocation type from the list, specify the quantity then click on OK in the bottom right-hand corner of the screen. Repeat this process for any additional types of allocations required.
 Click on Done to exit the Allocations sub-section and return to the Capacity tab. Next, click on Update to save changes without exiting and navigate to the Delivery tab.
The Delivery Scheme will be inherited from the parent folder defaults but these can be modified for this particular product by using the Add, Edit and Delete icons at the bottom of the Delivery Scheme section.

 The On Sale Scheme options should be configured at top parent folder level and cascade down to all child folders. Select an existing On Sale Scheme for the product from the drop down list or, alternatively, create an additional On Sale Scheme from within the product by clicking on the New button.
Note: Once a new On Sale Scheme has been created within a performance folder, it can if required be dragged and dropped to a different location within the folder hierarchy to make it available to more folders and products.
 Next, click on Update to save changes without exiting and navigate to the Finance tab.
A Ledger Code Scheme can be selected from the drop down box if there are any defaults set in a parent folder, or alternatively, a new scheme can be created by clicking on the New button.
The Tax Rate for all tickets and any other items subject to VAT can be set using the drop-down box. If required, a Stock-Keeping Unit (product code) can be defined in the SKU field.
Next, click on Update to save changes without exiting and navigate to the Other tab. Here you can associate your product with Limits, Donation Schemes, Loyalty Schemes and Extra Information. For further information on these, please see the Folder & Product Defaults section of this guide.
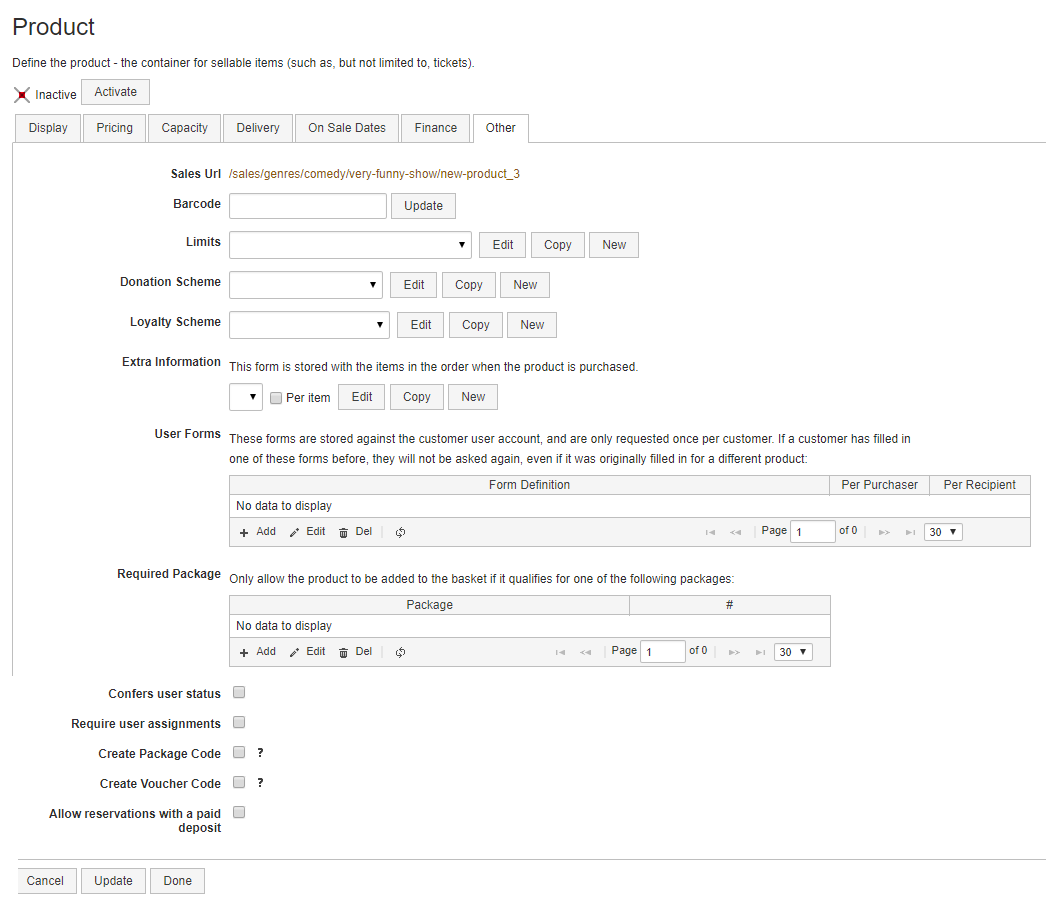
Requires Package
Confers User Status
Create Voucher Code
Allow Reservations with a Paid Deposit/Payment by Instalments
 Once you have finished configuring your product, click on Done to exit the item properties. In the right hand of the screen the new product will be visible, and will have a red cross at the far right to indicate that the product is currently inactive. The product can be activated (made visible to the public) by selecting the product, right clicking on it and selecting the Activate option.
Note: If a product or ticket is not due to be on sale to the public yet, it can be left as inactive until it is required. This can be very useful as it allows many events to be completely set up in advance of the on sale date, and shows to be advertised before their tickets go on sale.