Often an event will have more than one performance, either at the same venue or at multiple venues. This will require a show to be set up in Monad and then separate performance folders created for each instance of the show. These individual performances can then be linked to individual venues by creating folder shortcuts.
In this scenario, we have an event that will be running for two nights at one venue and then for a further night at a different venue.
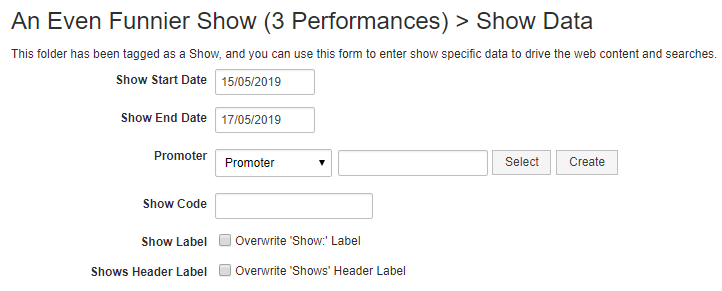
 Create a Show folder as before, by right-clicking on the chosen parent folder and creating and naming the new child folder. Note that the example used here, “An Even Funnier Show (3 Performances)”, specifies the number of performances in the title for training purposes only. The show name is all that is required.
On the “Status” tab, select the required “On Sale Scheme” from the pull-down, or set one up by clicking “New”. and tick the box which says “Apply to Contents”. This information will cascade down to any child folders (i.e. performances), saving you from having to set it up individually for each performance. This will then display a list of on-sale preview information.
Next Click “Edit Display” and repeat the process as before for entering web copy, changing the display settings and uploading an image.
Click on Done to save and come out of the Show folder.
 To create the performances, right click on the Show folder that has just been created and select Create Folder, then name the new folder something useful, e.g. the performance date, or date and time if there’s more than one performance in a day. Repeat this process for each performance.
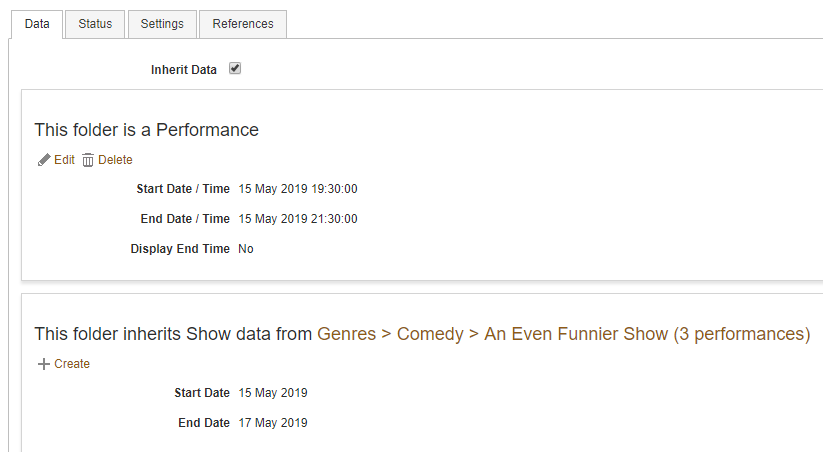
To set the performance properties, right click on a folder and select Properties. Navigate to the Data tab and you will notice that the Show data has been inherited from the parent folder.
Click on Create under “There is no Performance data associated with this folder” and enter the individual performance start and end date and time, then click Done.
Once you have created and configured all of your performance sub-folders you can add them to a venue, and add tickets to each performance if you are responsible for selling tickets for the event.
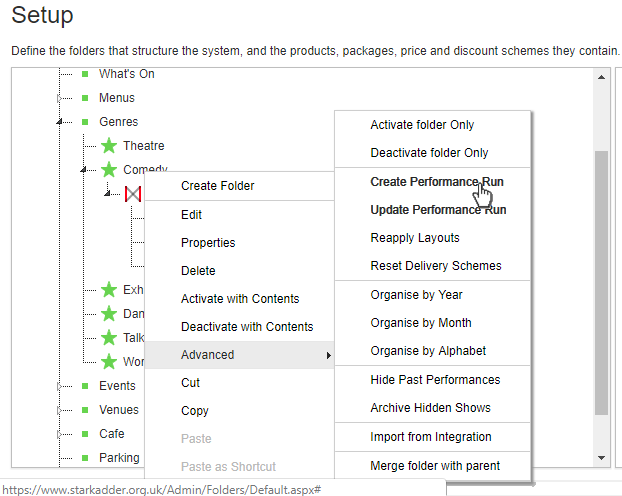
If you are setting up a whole set of performances that are all very similar, it is possible to set up one performance underneath a parent show, format it as a performance (this step cannot be omitted) and add tickets etc., then go to the file tree in Setup, right-click on the performance and select Advanced à Create Performance Run. From here you can create a set of similar performances and then modify them individually.
 Under “Template Name Format” you can pick how you want the name and date of each performance folder to look.
 Under “Add Dates” choose either the “Add Single Date to Run” or the “Add Pattern of Dates to Run” tab. The latter allows you to set a range of dates that you want your duplicate performance folders to cover. For example, selecting Repeats = Daily, Repeat every 1 days, Starts on 22/04/2019 and Ends After 5 occurrences and clicking Add Dates creates performances for the 22nd, 23rd, 24th, 25th and 26th of April.
These performances will be added to a list at the bottom of the screen, to which you can add by selecting more and different combinations of dates, times etc. You can also delete a date from the list by clicking the X at the right of that date. Click “Create Performance Run” when satisfied, and a message should appear across the top of the screen, stating that the following performances have been created, with your list of dates. Once you are satisfied, click “Back” to return to the file tree.